Underwater White Balance Explained for Divers
White balance underwater tells a camera or an editing tool which colour should count as neutral, then shifts every other colour to match. In shallow water that removes most of the blue or green cast. What it cannot do is bring back red the water has already absorbed, because a sensor that recorded almost no red has very little to shift.
Try Dive Color
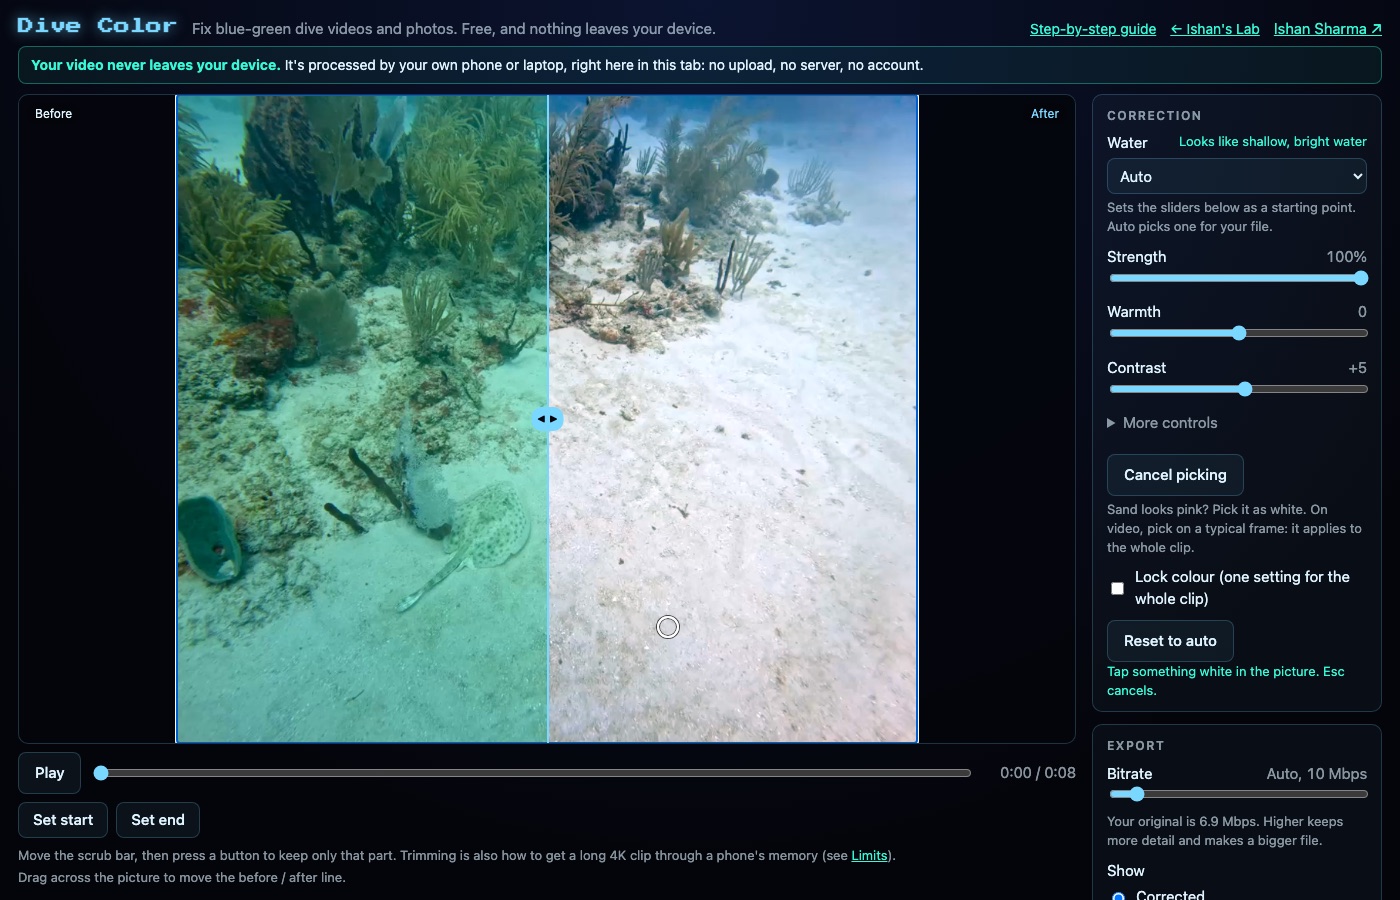 Open Dive Color, free in your browser
What does white balance do underwater?
Above water, white balance compensates for the colour of the light, such as warm tungsten indoors or cool shade outside. Underwater the idea is the same, except the light is sunlight that has travelled through water and lost some of its colours on the way.
The correction is a multiplication. Red, green and blue are each scaled by a different amount so that something which should be grey or white comes out grey or white. Scale red up and blue down, and a blue frame moves towards neutral.
Multiplying only works on a signal that exists. Doubling a very faint red channel also doubles its noise, which is why heavy corrections on deep footage look grainy and smeared.
Why does red run out first?
Water absorbs red light first, so dive footage comes out blue-green. The longer the path through the water, the less red reaches your lens, and the red channel in the file gets thinner until it is mostly noise. Very deep or dark shots have little red left to rebuild, whatever tool you use.
Green water is a separate case. Lakes, fjords and quarries lean green rather than blue, so the correction has to pull green down as well as put red back.
If your clip is simply blue and you want the wider picture first, I wrote about it in Why Is My Underwater Video Blue? And How to Fix It.
What can white balance fix, and what can it not?
White balance does well with:
- A blue cast in shallow, bright water
- Green tint from lakes and quarries, once the green is reduced
- Sand, a pale wreck or a slate that should read as neutral
It struggles with:
- Red that was never recorded, which shows up as noise instead of colour
- Footage lit by a torch plus daylight, because one setting cannot suit two light sources at once
- Haze from particles in the water, which is a contrast problem rather than a colour one
The second list matters when you choose how hard to push. A moderate correction on a clip with some red left looks natural. Heavy correction on a clip with none looks like a filter.
Should I set white balance in camera or afterwards?
A custom white balance set at your working depth is a sensible start, and it keeps the footage closer to neutral before any editing. It is right for that depth only. Descend a few metres or come up over a reef and the colour moves, while the camera setting stays where you left it.
Correcting afterwards can follow those changes. The catch is that heavy corrections on compressed video show their limits sooner, so a clip that starts closer to neutral usually survives the edit better.
Where does Pick something white help?
I made Dive Color for my own dive clips. It runs in the browser, with no account and no upload, on videos (MP4, MOV) and photos (JPG, PNG). The correction is plain maths, not AI, and has three parts:
- Red compensation adds back red the water absorbed, using a method from Ancuti et al. 2018. It only ever adds red.
- Gray-world white balance scales red, green and blue so their averages match, with limits so it cannot go wild.
- Levels lift the haze using black points and one shared white point, so deep-blue shots do not turn purple.
For video, the page reads the clip about twice a second and smooths the readings, so the colour follows depth changes without flicker. Lock colour uses a single setting for the whole clip instead. Water type is set to Auto, which guesses from the average colour and brightness and shows a line such as "Looks like green water". The guess is plain thresholds, so change it if it is wrong.
The automatic result is usually where I stop. Sometimes sand or a white object still has a cast, and that is where Pick something white earns its place:
- Open your clip in Dive Color and look at the automatic result.
- Press Pick something white. A ring follows your pointer, and Esc cancels.
- Tap the sand or white object. The tool scales red, green and blue so that spot comes out neutral.
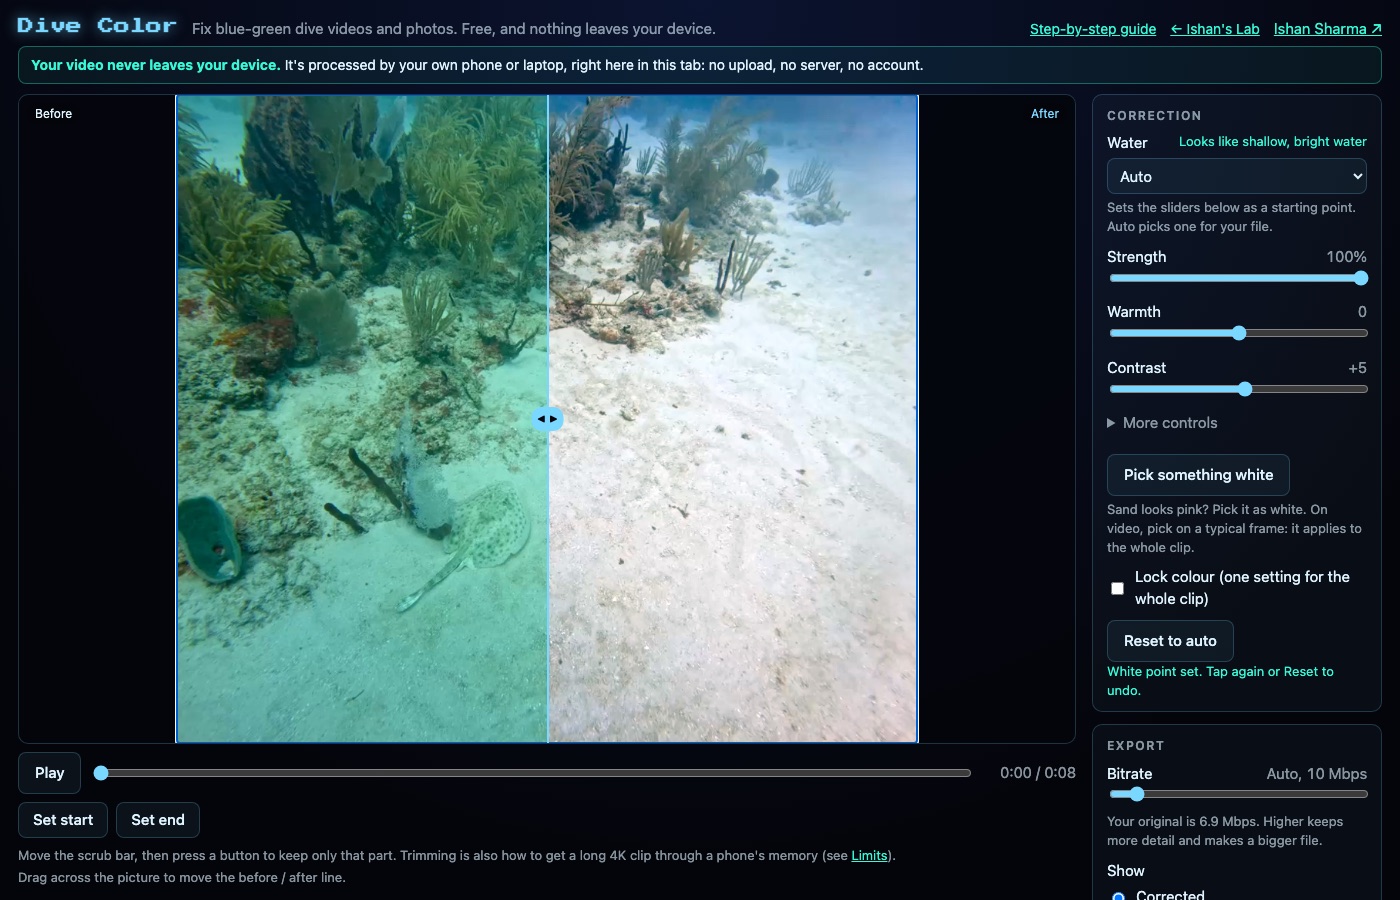
- Check the status line says White point set. On a video the tool uses the current frame and applies the same change to the whole clip.
The change is limited, so a bad tap cannot wreck the picture. Reset to auto puts everything back if you want to try another spot.
What it will not do is rebuild red in a very deep or dark shot. A tap on white tells the tool what neutral looks like, and the red still has to be in the file for the result to look natural. Nothing is uploaded, so the corrected clip is a file on your device. If you shoot on a GoPro, How to Colour Correct GoPro Footage Free in Your Browser covers the export side.
How do I choose a good spot to tap?
Pick something that really is white or neutral grey and is lit by the same light as the subject. Sand on a reef flat works well. A white object sitting in shadow does not, because the shadow changes its colour and the tool will correct for the shadow rather than the scene.
On a video, scrub to a frame where the object is clear and well lit before you press the button, since the tool takes the current frame as its reference.